
Incredibly Biased and Probably Daft
Peter Kraatz, aka KinzuaKid
Last Updated December, 2017
Introduction
This is a strategy guide for Animation Throwdown Rumble Play. I wrote this guide with my current guild in mind. Thanks for the feedback, Robot High Council! Yes, there are zillions of videos and tons of strategy discussions on Reddit and Kongregate but I’m not a Redditor (FARKer here) and I hate watching people play games. I play them. I don’t spectate. Also, you could just play the game and learn all this yourself but that’s not helping or you wouldn’t be reading this. It’s way too long and complete garbage on several points, so take it all with a grain of salt.
Naturally, all game images below belong to the publisher and are included here for reference only.
Preface and Conventions
Everything is opinion unless backed up by data. Most of this is not.
This guide assumes you have an advanced understanding of game play, deck management, Skills, Traits, scoring, and combinations. The reader should have finished the bulk of Adventure Mode through Onyx and possesses a deck comprising Legendary (purple) or Epic (blue) cards. You may not be in SFC yet, but you’re probably close. Beginners will benefit from many of the tips below but some will be difficult to employ.
It does not matter if you’re a P2P or F2P player but you should have your ad bonus maxed out, even though it has no effect on Rumble play. That will help during your Rumble preparation.
- I’ll refer to card rarity by color, rather than by name, throughout this document. See above.
- Skills I will refer to by their proper name.
- The card positions on the board I will refer to as, from left to right, slot 1, slot 2, etc.
- Your opponent is the AI.
- When in doubt, “Deploy” will almost always mean “put the card in your deck.”
- By contrast, “Play” will normally mean “put the card down on your turn in play.”
This guide also assumes you have mlebkowski’s github tools and strategy site bookmarked, here:
A Word About mlebkowski’s Utilities
I’ve never talked to the guy/gal, but if you’re not leveraging those tools to their fullest potential you are robbing yourself of a key resource. Even if you’re just a casual player who simply wants to do the best with what you have on a minimum timescale, mlebkowski’s tools are the gold standard. This guide is at least in part inspired by those efforts, which allow me to research specific variations and combinations quickly for my own deck assembly.
Animation Throwdown Rumble Strategy Guide
A Word About mlebkowski’s Utilities
Setting the Stage and Goals: Rumble is Different
This Game is About COMBOS, Not Cards
More Combos: So Nice, it’s in Here Twice
Play Your Dailies and Perform Maintenance
Turn Two: Motivate, Leech and Da Bomb
Turn Three: Your Hand is Forced
Payback: AI Hero is The Giant Chicken, Fry, Roger, Brian, or Dale
Guaranteed Win With a Chance to Save
Guaranteed Win, Guaranteed Imperfect
When All Else Fails: Play Defense
Setting the Stage and Goals: Rumble is Different
Adventure, Arena, Challenges, and Rumble have subtle differences in gameplay that change the way you will approach the Rumble specifically. I’ll address the actual mechanics of exploiting these differences later. For now: the first and most important thing to remember:
Rumble scoring is not about winning, but HOW you win.
This knowledge should be assumed of the reader but to score a perfect 100 points in a rumble match the player must end the round with full health for all cards on the board and of their hero. It is possible to lose one or two card health points due to hero Punch or Payback and still score 100 points, but I’ll cover that in detail later.
In the Rumble, you have first play AND first strike.
This is not a trivial point. In Arena mode (SFC), the AI plays the first card, but the AI’s slot 1 card must sleep one additional turn before activating the primary attack. In this case, your first card gets to attack before theirs, but the AI will almost always play a second card in slot 2, rather than creating a combo in slot 1. This is to say you both can see what you’re up against and plan accordingly, since you can predict the AI’s behavior beforehand. You don’t care about anything but a win in Arena mode, therefore you can choose to play a much wider array of cards and take a few hits to your hero if it suits your deck or you want to let a card with Crazed build up strength in slot 1.
In the Rumble, you play first and the AI’s slot 1 card is not forced to sleep additional turns. This means you strike first but have no intelligence about the AI’s deck before you play a card. It also means you have less danger of losing unanswered hero points in slot 2 on the AI’s second turn. Finally, the AI gets to play against your first card using the best card it has on hand to respond. On this last point, the AI is very good, and it is these three elements together that require you to use a better scoring strategy for Rumble play.
In the Rumble, you Need a Short Game
I cannot emphasize this enough, so I will repeat it in the gameplay section: your secondary goal and best chance of a perfect game is to keep it short. Four-five turns are a nice, aggressive target. I don’t complain about a six or seven-turn game, either, but if your game is stretching out to eight-ten turns or more, you’re cooked. You may win but you’re very likely taking a LOT of damage. Every turn gives the AI just a little bit more advantage. That fact is no different from Arena play.
Deck Assembly
Here I’ll cover useful tips for deck assembly including card choice, playing to the BGE, and skills.
Card Rarity and Level
In general, all decks evolve to purple and gold. Just because yours isn’t 100% purple doesn’t mean it’s a crap deck. There are many blue cards that have staying power, even at the higher Rumble ranks.
This card lasts a surprisingly long time
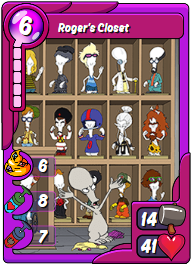
If you’re juggling a large number of cards, a good rule of thumb is that a maxed-out blue card beats an unfused purple card. This is not true in all cases by any means but it’s common enough to be the conservative position. All this means is that while your deck is in transition between blue and purple, don’t just toss in a purple because of its color. Study it carefully and in the bigger picture strategy of the combos you can make with it. To wit, Bending School:
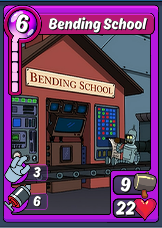
Wat?
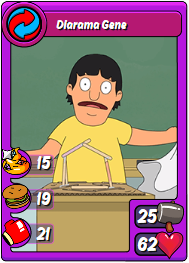
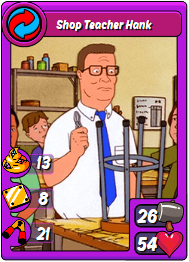
This card is a horror show by itself. I can think of a dozen maxed-out blues that will crush this card if given half the chance to combo. That said, Bending School just happens to combo to form Diarama Gene and Shop Teacher Hank. Here you’re seeing them in their weakest form:
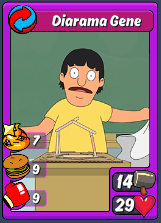
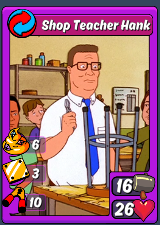
At higher levels these cards are unstoppable workhorses:
I think this is a good segue into…
This Game is About COMBOS, Not Cards
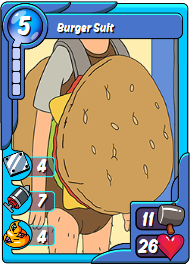
Sure, “Animation Throwdown – The Quest for Cards” seems to suggest the game is about cards, but it’s not. The game is about combos. Let’s be clear; if you’re talking about this card…
38 total damage is nothing to sneeze at
…then it’s most definitely about the card. Don’t have 25 of those? Good. Let’s talk combos.
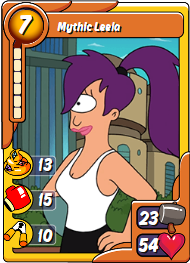
There are only a handful of cards like maxed-out Mythic Leela you can reasonably deploy without first having useful combos available with the other cards deployed and, second, having researched those combos.
Naturally, you should be researching new combinations ahead of an upcoming BGE and in line with the cards you either already have deployed or expect to deploy soon. The reason for this should be obvious. When you have a choice between researching, say, a blue-purple or a purple-purple for the same combo, always choose the higher power option (purple-purple).
More Combos: So Nice, it’s in Here Twice
You should be using mlebkowski’s “Combo Recipes” tool to prioritize your research and you should be leveraging his “Share Your Deck” tool to check your deck’s flexibility. You’re a smart player so you’re already doing that. You’re using that tool to insure the maximum probability of making good combos by avoiding this:
The dreaded “inadequate” flag
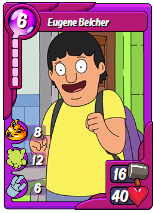
Having a few cards show up on this list is not going to break a good deck, especially if the cards in question make superior combos and you have a bunch of the corresponding card to pair it. One “Book of Spells,” for example, is terrible. Deployed in your deck with three 6* Bobby cards and your game is awash with:
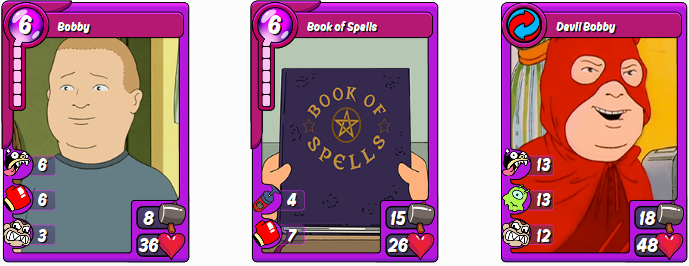
Everybody’s favorite li’l ass-kicker
Upgrading Cards
Do that. If you don’t have enough Giggitywatts to bring a card up to its maximum stats at whatever fused level it’s at, farm more Giggity until you can. Only deploy fully upgraded cards unless you have no other option. Mythics are the sole exception, since they do not use Giggitywatts to upgrade. Just to clarify: if you have a once-fused card and a single of the same card lying about, upgrade the fused card and deploy that. Ignore the single for now, unless the next paragraph applies to you…
With respect to Action cards: Your cards are most effective together when they are roughly at the same level of rarity (color), fusion, and upgrade. This is how you should set your priorities for spending Giggitywatts when they’re in short supply. For example, if you’re fielding a deck with mostly once-fused cards, adding a single card, unfused, will likely do more harm than good unless it is a Power card or creates a monster combo option (see above). Similarly, resist the urge to quad-fuse a card pair in this case unless you have another fused card (at least) to replace the one you lose. The temptation to max out everything can lead to disastrous results when you don’t have the card variety or combo support to backup that one quad-fused monster.
If you are swimming in Character cards, life is good. You can afford to upgrade your Characters out of line with your Action cards.
Deploying for the BGE(s)
The battleground effect (BGE) is an interesting twist that is at times non-optional and at other times trivial and insignificant. When the current BGE offers a 50% bonus to attack and defense, you simply have no choice but to favor the BGE when deploying cards. In that case, you should deploy as many BGE-related cards as possible. Those buffs make marginal cards much more powerful and powerful cards omnipotent.
When the BGE offers buffs to Heal/Leech, you have more options. Those buffs will help keep your cards at full health and you should deploy enough of those BGE cards to insure you can recover that one card which keeps taking damage. I like to stack the deck in these cases with about half of my cards focused on that BGE.
All other BGEs are basically optional and should be favored based on your overall deployment strategy and deck makeup.
There are a handful of cards that benefit from TWO BGEs simultaneously. If you have those cards and both BGEs are in play you should find a way to deploy those cards, at least for the duration of the BGEs. During the short window where the Musical and Disguised BGEs overlapped, this Heavy Metal Hayley would have been ridiculous:
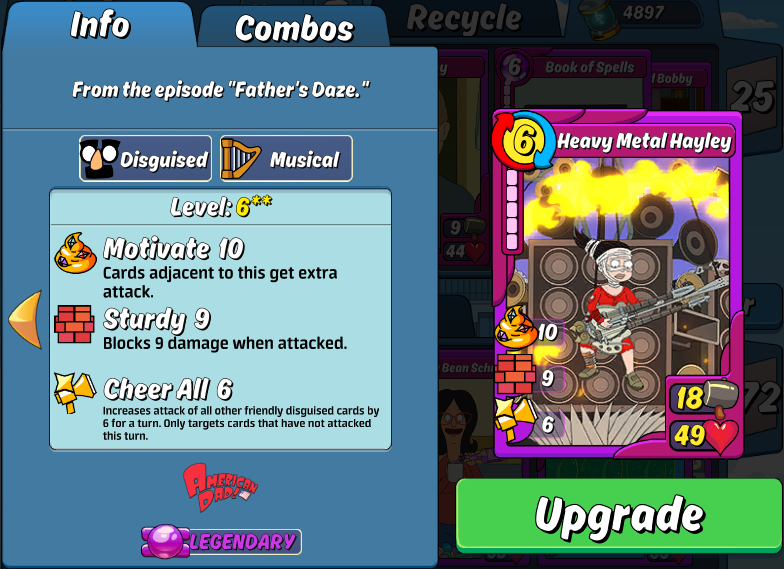
A very nice support card
Deck Size
The consensus is that the fewer the cards, the better. Everything from 10-13 cards each of character and action cards with no more than 3-5 Power (precombo) cards has been debated. Your mileage may vary. Experiment with your specific cards. For example, I’ve had success with both 13/13/3 (29 cards) and 11/11/3 (25 cards). It’s always an experiment. Having over 30 cards deployed is a terrible idea. Every new card reduces your probability of making the best combos in each round.
In future updates I’ll add probability calculations so you can see just how drastically your odds fall by adding just one or two unnecessary cards.
The primary challenge is with your Character cards. To deploy a balanced deck, you need Character cards. You will always have more Action cards than Character cards, which makes balancing the levels across the Characters more difficult. You may be forced to field a larger or smaller deck simply based on your Character card count. Deploying Character cards at levels higher than your Action cards will not hurt but that’s rarely the problem as your deck is evolving.
I use two additional rules of thumb: try to have pairs and triplets of each Character card deployed and keep them off the “naughty list.” You need every character to combo with at least 75% of the Action cards.
Skills – Offensive
Some of the more useful offensive skills to deploy for a rumble are covered here, along with guidance on maximizing the skills’ benefits in play.
![]() Motivate
Motivate
Motivate is a huge bonus in the Rumble because the skill is active as soon as the card is played and the effect is not reduced by Cripple. Play your card with Motivate in slot 2 or higher. Be careful deploying Motivate cards limited to a single Trait or Show. Motivate can be Hijacked, though, so do not to drop a Motivate card next to another card subject to Hijack by the AI unless you have no other options or can destroy the AI card before it can attack.
 Crazed
Crazed is the granddaddy of all skills. Who hasn’t been crushed by a 97-attack monster? Your deck must have the ability to play Crazed either as a single card or through a combo to compete at the higher levels. The best slot for Crazed cards is slot 1, which allows the card to gain the most power throughout the match. It can be Hijacked and since Crazed cards usually start out with low attack you must be cautious if the AI has Hijack out.
 Punch
Punch
High Punch is like getting 2 different cards on the field at the same time, but without the ability to predict the target unless there’s only one AI card on the board. Punch is not blocked by Sturdy but is blocked by Shield and Bodyguard. There are only two options for Punch against Bodyguard: Punch with more power than the Bodyguard value or choose not to deploy Punch. Punch is great for reducing Shield, softening defenses. Punch is effective in any card slot. You will deploy many cards with Punch.
Be careful with your Punch cards in slot 1 and 2. Frequently you will need to deal primary attack damage in slot 1 or 2 so that Leech or Bomb can activate. If your Punch is too high you may destroy a card with Punch, leaving no card for the primary attack to hit, thus neutralizing your skill(s).
This is more common a problem with Leech, since if Bomb isn’t activating while you’re doing damage to the AI’s Hero, you’re still doing damage to the AI’s Hero and Bomb doesn’t actually require you to inflict damage on the card to activate (but it Bomb DOES require there be a card present in that slot for you to strike). The AI will seems to play away from your Leech card. If you have a Leech card in slot 1 that has destroyed the AI’s slot 1 card, but is still damaged, the AI will generally choose to combo a card in slot 2 versus replacing the destroyed card in slot 1.
 Hijack
Remember what I said about needing Crazed? Everyone else did and now you need to defend against it. Why isn’t Hijack a defensive skill? You got me. It’s both. Hijack is possibly the most underrated skill in the game. If you see a card with Motivate, Cheer, or Crazed come out you should be looking for a Hijack card to play on your next turn in the appropriate slot (directly across from the card to be buffed, of course). This skill is a huge bonus in that it defends against AI buffs and adds to your attack, using their power against them.
 Bomb
Bomb
Bomb needs to be played in slot 2 or 3. It is unhindered by Sturdy and weakens Shield. Bodyguard blocks it but you can usually find a Bomb card powerful enough to get past most Bodyguard values (not valid for Mythic Peggy or Mythic Bob combos).
 Gas
Gas
Gas is a must have in your defensive deck, if not your offensive deck. The AI may play terribly for you (when you’re on defense and not there to watch) but if it gets a Gas card out in a Rumble the opponent is not going to score well. As an offensive card Gas may be your only option against tough cards. It needs time to work, so play it in slot 1 if you can, 2 if you can’t. Gas can rescue a losing round.
Playing Gas offensively usually means taking some damage but can limit your exposure to a single turn of attack, which opens more options if you get even a modest Gas card out on turn one.
 Jab
Jab
Jab is everywhere, you can’t escape it. Jab is primarily an insurance policy. No matter how you plan, you never seem to have Jab available when this card is on the AI’s board:
Skills – Defensive
Some of the more useful defensive skills to deploy in your deck for a rumble are covered here, along with guidance on maximizing the skills’ benefits in play. Your emphasis in building the deck should be first on preventing damage to your cards. Since you won’t be able to prevent that entirely, recovering damage already dealt becomes the secondary goal.
 Bodyguard
Bodyguard is the best defensive skill in the game. It protects up to three cards instantly as it is active immediately when the card is played. Bodyguard is great for protecting a card that has been Gassed already, preventing future damage. So, naturally, the best slots to play Bodyguard are slots 2 and 3. Bodyguard also does not reduce after each attack, so a single 10-Bodyguard card can protect against an unlimited number of <10 Punch, Gas, and Bomb attacks every turn. The side benefit is that while Bodyguard does not stack, cards will use the highest Bodyguard available if multiple Bodyguard cards are on the board.
Update: More about Bodyguard…
Some folks are confused about how Bodyguard works and question its value. One strength to reinforce is that, unlike Shield or Sturdy, Bodyguard does not “reduce” with each attack against it. This means that the card with 10-Bodyguard can get hit by 10 Punch, 10 Gas, and 10 Bomb in the same turn and still take no damage from those skills. Heck, six opposing cards can hit it for 10 Punch with no effect. Bodyguard is also unaffected by Jab; this defense cannot be weakened by the opponent except by destroying the originating card. Because this skill is immediately applied to up to 3 cards (the card with the Bodyguard skill and its left/right neighbors) Bodyguard is a massively useful defense skill. Bodyguard does not defend against primary attack, so protect that card when it’s on the board.
 Leech
Leech
Leech is essential for maintaining 100% health during a tough rumble. The caveat is that you need to inflict damage on the AI’s card with your primary attack to receive the Leech benefit, so deploy Leech cards when you are certain you can get past the AI’s Sturdy and Shield with your attack. If you need Leech to activate, be wary of playing too high a “Punch” card. You don’t want to destroy the target with Punch before you get to Leech it. Leech is most useful in slot 2, followed by slot 1 because you’re more likely to have a “sleeping” card in slot 2 when it is first attacked. See the gameplay section for more explanation.
 Shield and Shield All
Shield has a big advantage: it blocks everything but Gas, including Payback. Shield won’t stop damage to an already Gassed card but it will stop the primary attack damage that allows Gas to take effect.
I have inconsistent results with Shield. It is often limited by Show or Trait, making the skill more difficult to deploy and play effectively. In a longer game (5+ card slots occupied) regular Shield is unpredictable, protecting the wrong card seemingly every time. In most cases, playing a Shield card in slot 1 is just taking up room from a better skill like Punch or Crazed.
Don’t let that uninspiring story sway you. For higher values of Shield it is an indispensable defensive tool if you can play it to become active on turn two or three.
 Cripple and Cripple All
I like to knock down the AI’s attack. This makes recovery easier with Leech and Heal. Cripple All is really the best option and I prefer a 5 Cripple All card over a 10 or 15 Cripple card, all day long. Cripple never seems to hit the right AI card consistently for me. The bonus is that cards Crippled to 0 don’t have a primary attack, so you don’t get hit by Bomb, Leech, Crazed, or Gas.
Remember: Cripple doesn’t remove bonus attack granted from the AI’s Motivate cards.
 Sturdy
While Bomb goes right through it, primary attacks from the AI are defended. This can prevent Bomb, Gas, Crazed, and Leech from activating. I add Sturdy to a card’s defensive point value to measure its true resiliency in the game. It’s inferior to Shield but you always know the effect is entirely predictable and is active immediately upon playing the card.
 Heal and Heal All
I like the Heal skills but they’re difficult to deploy and play effectively, with most of these cards limiting their effect to the card Trait or Show. The most effective slots to deploy Heal are slot 2, then 1, then slot 3. In some cases you will see more benefit from slot 1, then 2, then slot 3. If you’re playing cards in slot 4+, heal isn’t going to solve your bigger problem of losing the match. You’ll need better cards for that.
Heal seemingly chooses the wrong card to target 8 out of 10 times in play. Even so, I can always use more of these cards in my deck.
Skills – Stupid
These aren’t useless, but they’re not worth trying to get worked up over or play with/against because they’re only important in edge cases and weird rounds that go eight-ten+ turns. Remember what I said about games that go eight-ten+ turns?
 Give
Give
Give is only a Hero skill. I’ll talk about Payback and Give skills on your Hero in the Hero section.
 Cheer and Cheer All
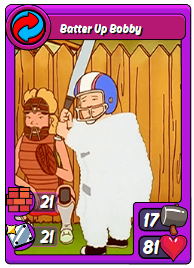
On the Hero, Cheer is mediocre. On a card, it’s only truly useful in slot 1 and many times is restricted by Trait or Show. I say “slot 1” because Cheer only affects cards that have not yet attacked, which is to say everything to the right of your Cheer card. So slot 1, really, is the only choice. Slot 2 might be useful if you’re lucky or have a stalemate going on in slot 1 with your Batter Up Bobby combo.
 Boost
Boost
Boost depends on you making a lot of combos. That only works in slot 1 or 2, since we need to play a minimum of 3 cards to get the first boost and 5 to receive the second. It’s nice to have as an unexpected bonus but don’t play to it.
To explain, here are the 4 possible outcomes when hunting for the Boost effect, with a description of your situation after turn three:
- Slot 1 Boost (naked card), Slot 2 combo: Slot 1 Boost card destroys AI card 1 with full health after getting 1 boost effect. This is a good outcome but requires a Boost card with very high attack to start in slot 1.
- Slot 1 Boost (naked card), Slot 2 combo: Slot 1 Boost card takes damage from AI card 1 after getting 1 boost effect. This is a good outcome but requires a Boost card with very high attack and health to start in slot 1.
- Slot 1 combo, Slot 2 Boost (naked card): Slot 1 combo card destroys AI card 1 after giving 1 boost effect. This is the very best outcome, but will likely take some damage to both cards now on the board. You must play two cards in slot 3 to get another bonus and hope you can Heal or Leech the health back before the round is over. The effect can be risky to use.
- Slot 1 combo, slot 2 Boost (naked card): Slot 1 combo cannot destroy the AI card. Slot 2 Boost card gets 1 boost effect. Likely both of your cards have taken damage and one may be in jeopardy of dying. Sorry, can’t help you. This is going to hurt.
Boost can work well under the right circumstances but is risky and counter to your perfect game strategy. Boost demands that you do not play Power cards, even if they are good, since you get the Boost only by MAKING combos in play. In a short game the card is going to receive the Boost effect 2 times, max.
 Recover
Why? Recover doesn’t get you back to full health because it raises the card’s max health while giving that card the same amount of health boost. If you were 10 points down, you’re still 10 points down. There is a small effect to your overall score with Recover but its tiny. Use Heal instead.
 Payback
Payback sounds nice but if you’re using it your card has already taken damage. For tough matches with high Payback in play, it’s a nice bonus. I wouldn’t focus on it. I’ll talk about Payback and Give skills on your Hero in the Hero section.
Pre-Rumble Preparation
Check Your Deck and Autoplay
Before you launch into a Rumble round, hit up the Arena or Adventure mode and make certain Autoplay is disabled. Also make sure the deck you want to use for the Rumble attack is actually enabled.
Play Your Dailies and Perform Maintenance
This is free upgrade time. Play your Daily Quests, which includes buying and upgrading cards. You never know when those few extra Nixons will drop just the purple you need to fuse a card.
Check and Change Your Hero
If you’re looking for a perfect score, particularly in rounds 1-8 of a Rumble, you need a Hero with Heal. Tina, Consuela, Ricky Spanish, John Redcorn, and Zapp Brannigan are your options. Use the Hero with the highest single card Heal you have. Most of the time, you’re only trying to Heal one card that’s been Punched, Gassed, Bombed, hit by Payback, or damaged by a primary attack.
After round 6 in a Rumble, you have a few choices to make. It becomes increasingly unlikely as you advance up the ladder that a perfect score is possible in every game. You now have to decide whether to switch to a different Hero to maximize your performance. A low score is much better than a loss, every time. Most players look for a Hero with Punch to add just a few more points to the damage total on that first card. This includes Bobby, The Giant Chicken, or Zapp Brannigan.
You will notice I left out a lot of Heroes from the two lists. This is because those Heroes’ other useful Skills are limited by Show. If you have a Show-specific deck, by all means, explore those options.
Gameplay
Tips and tricks for maximizing your score or minimizing your loss.
Keep it Short and Snappy
Your secondary goal and best chance of a perfect game is to keep it short. Four-five turns are a nice, aggressive target. I don’t complain about a six or seven-turn game, either, but if your game is stretching out to eight-ten turns or more, you’re cooked. Every turn gives the AI just a little bit more advantage. That fact is no different from Arena play.
Don’t Tip Your Hand
The AI does a fair job of anticipating your second card. I find that if I lead with a Character card, I get better results because my combo possibilities are not as limited and the AI can’t anticipate my next move as easily. This is not always possible but when you have a choice and you already know your first two cards for a combo, lead with the Character card from the combo.
Don’t Lead with Motivate
The AI does a fair job of anticipating your second card. If you drop a Motivate card in slot 1 you may see the AI drop a Hijack card in slot 2. Don’t make it easy. Also, you’re robbing half the power from Motivate when it’s in slot 1. A great twist on this tip is to drop a Trait or Show specific Motivate card and follow it up with another card that won’t benefit from Motivate, since it’s in a different Trait or Show. I’ve faked out the AI more than a few times this way.
Turn One: Exterminate
Your first play should generally lead with a card that will setup the maximum attack possible using Punch and Primary attack (or, if you don’t have Punch, Gas is a decent second choice). You’re shooting for at least 30 points of damage here when that first card or combo activates on turn two. Obviously, you’re trying to kill that first card so all your other attacks are naked, right to the Hero. Destroying the AI’s first card is NOT a strategy, however. This is a tactic, and one that works better than every other tactic. It works best in coordination with your other game play and deck construction tactics. Don’t lose sight of the big picture; it’s very easy to score perfect games without smothering that first card on turn two.
If you destroy the first card without taking any damage, you will not likely need Leech as the odds are solidly in your favor. Hold that Leech card back if you can.
Turn Two: Motivate, Leech and Da Bomb
The game (and your perfect score) is most often won or lost on turn two, so I’ll spend some time unpacking it. There are only 2 starting positions on turn two, either:
You can destroy the AI’s first card
-or-
You cannot destroy the AI’s first card
If you can destroy the AI’s first card you’ll be faced with three possibilities. Either:
- Your slot 1 card can destroy the AI’s first card without any help on turn 2. In this case, prepare for a more aggressive card from the AI on turn two by playing the strongest combo in your entire deck on slot 1 (if you have those cards in your hand now). Otherwise, you can buff slot 1 with Motivate in slot 2. If you cannot do either of these things, play the card that gives you the best combo options for turns three and four.
Or…
- You can destroy the AI’s first card either by playing a combo in slot 1 or by playing Motivate in slot 2. In this case, unless the combo option produces your strongest play you should drop Motivate in slot 2. Save the combo for later. Now is a good time to play that card with Boost and Recover you can’t seem to use otherwise. It’s literally the best (and probably only) time to play these cards.
Or…
- You can destroy the AI’s first card only by playing a combo in slot 1. In this case, play the combo, but also prepare yourself for a more aggressive card from the AI by playing a combo with Crazed or Punch if you can.
If you cannot destroy the AI’s first card on turn two, you’ll be faced with four possibilities:
- Your slot 1 card will survive any attack on its own and you’re in no danger of losing unrecoverable damage. In this case, you should probably protect slot 2 with a new card that offers Bodyguard, Shield, Leech, Heal, Bomb, Cripple, or Gas. Play the card that insures you will recover that damage.
- Your slot 1 card will survive any attack on its own but you risk losing unrecoverable damage without another card (Heal) or combo (Leech). Playing a Leech combo in slot 1 on turn two may be premature. You should favor a Heal card in slot 2 and play the Leech combo on turn three. Failing that, play the combo in slot 1.
- Your slot 1 card will not survive an attack unless you combo that card. You must play the combo.
- Your slot 1 card will not survive an attack even if you play a combo. STOP. Don’t waste two cards by playing the combo. You are at serious risk of losing the match! Protect slot 2 and hope for a better draw for turn 3. Power cards and cards with Bodyguard, Punch, or Bomb are good here. Cripple will help, too.
In the Skills section I mentioned Leech being best suited for slot 2, since you’re more likely to have an exposed, sleeping card there taking damage. Turn two is when you will know if this is going to be the case.
Turn two is a good time to play your Bomb card in slot 2 if the card in slot 1 is having a little difficulty and you don’t have a good combo on hand yet to finish it off in one strike. Motivate is better, because it can usually get your slot 1 card over the line much easier and opens more options later.
Turn Three: Your Hand is Forced
Now you’re either on your way to an automatic win or at risk of losing it all.
If you killed the AI’s first card, do damage control with Heal, then just keep piling on the Motivate, Crazed, and Punch in subsequent turns. Always assume the AI has a bigger card coming out that will slow the game down and punish you for not playing Heal or Leech. If you play prudently, game over.
If you couldn’t kill the AI’s first card, you’re probably staring at damaged cards or are about to play a card that will take damage on AI’s turn three. You either have a combo in slot 1 or a single card in each of slot 1 and 2.
You need to kill that first card, now, or actively defend your own slot 1 card. If you can’t do either, start building to the right. Now is when you have to take a hard look at slot 3 because this game is going to run to turn five, six, or a lot more without some good fortune.
Payback: AI Hero is The Giant Chicken, Fry, Roger, Brian, or Dale
Payback is the enemy of a perfect score. Thankfully, it’s not difficult to work around but it does limit your options on the first three turns. The scoring is a little opaque on this point. I’ve received a perfect score on occasion after getting one card hit with Payback on the last turn without being healed. Don’t count on it, though.
Hero Payback only happens when you hit the Hero directly and fail to kill him, without destroying another card in the slot across from your attacking card on the way. Payback does NOT activate if you destroy a card on the way to smacking the Hero or if you kill the Hero to end the match. With this in mind:
- Never play a Power card in slot 1 when the AI Hero has Payback.
- On turn one, think carefully before you play a card or setup a combo that will enable high Punch in slot 1. You don’t want to destroy the AI’s first card with Punch.
- If you have a card with Crazed or Shield, turn one is the time to play it.
- On turn two, you should be looking to create a combo in slot 1, even if that means your turn three card in slot 2 will take damage. Try not to lose the Shield skill with the combo if you played it on turn one.
- On turn three, you can play that Power card you’re itching to drop in slot 2. Those with Leech and Motivate are the best, followed by Shield and Bodyguard.
- Alternatively, if you don’t have a Power card for turn three (a BIG one) you should be looking to setup a heavy attack combo in slot 2. Those combos that already are Shielded in the BGE (if that BGE is active) are the best to pick from, even if they’re not the highest attack.
- On turn four you are either finishing the AI off with your Power card in slot 2 while playing a card in slot 3 that will not activate, or you are creating a combo that will ultimately finish him off in slot 2, leaving slot 3 empty.
- Heal cards are best played in slots 2 and 3+. If you don’t kill the AI with a card in slot 2, for example, you may need Heal to activate in later cards on your turn.
The AI plays to its Payback skill, making combos in slot 2 if it can while slot 1 is empty. This forces you to take damage. If you know this, you can plan for it with Heal cards in slot 2 or 3, if you get that far. Sometimes, you just can’t solve the problem. In that case, see “Guaranteed Win, Guaranteed Imperfect.”
Guaranteed Win With a Chance to Save
Imagine you’re in the last turn of a match. No matter what card you play you are going to win the game. That said, one or more of your cards has taken some damage and it’s not clear they will recover their points in time.
Your last card should be one of two options: if you can, play a combo that will enable Leech or Heal to close the gap. If you cannot, play a new card with the HIGHEST HEALTH in the next open slot. Do not create a combo. Because your score is based on the % of total health remaining versus the total max health of cards on the board plus your hero, you can easily squeeze another 5-10 points out of this move, every time.
Guaranteed Win, Guaranteed Imperfect
Imagine you’re in the last turn of a match. No matter what card you play you are going to win the game. No matter what card you play, you will end with some damage that will reduce your score below 100 because you cannot Heal or Leech it back, nor can you make a combo that will Heal or Leech it back. This is usually a card sitting in slot 2 or 3 that has nothing to attack for Leech, or because your Heal cards are all the way out in slot 3 or 4. They will never activate.
To minimize your point gap, play a new card with the HIGHEST HEALTH in the next open slot. Do not create a combo. Because your score is based on the % of total health remaining versus the total max health of cards on the board plus your hero, you can easily squeeze another 5-10 points out of this move, every time.
When All Else Fails: Play Defense
If you have no chance to kill the AI’s slot 1 card by the end of turn two, you may want to consider playing Cripple, Sturdy, Shield, Bodyguard, or even Gas. Do NOT let the AI gain the advantage of Crazed or Gas with a successful attack.
Sometimes, Your Card Must Die
Imagine you’re near the end of a game and one of your cards is hopelessly Gassed. It will probably die before the end of the round. At the very least, it’s weak enough that the AI’s attack will go right through it and hit your Hero if you don’t win this turn. You can either play more Heal cards to improve its disposition or move on and take the punishment.
Let it die. Take the punishment.
If you know the card will die on your last turn and you are guaranteed the win, don’t try to save it. Let it die. Because your score is based on the % of total health remaining versus the total max health of cards on the board plus your hero, it is better to take a few points off your Hero and have no card left in the slot than to have a badly damaged card alive at the end of the round.
The right move then is to play a new card with the HIGHEST HEALTH in the next open slot. Do not create a combo.
What If?
- What if you’re upside down after turn three or four?
That’s where you must get creative. This thing isn’t a formula, you know.
- I said:
“You’re shooting for at least 30 points of damage here when that first card or combo activates on turn two.”
What if that’s impossible for your deck? What if you just don’t have the cards for a 30-point strike?
OK, you don’t. Do what you can. At some point you will have those cards and more.
- What if your cards just aren’t strong enough AT ALL and you lose every Rumble game?
At that point, you’re either in the wrong guild or just started with Animation Throwdown. This probably isn’t the guide for you.
- What if you draw all Character cards for the first three turns (8 Characters) or all Action cards and cannot make any combos?
You’re screwed, or not. That limits your options dramatically but it’s not impossible to prevail if you play carefully. So play carefully.
Pingback: The Practical Polymath
“What if you draw all Character cards for the first three turns (8 Characters) or all Action cards and cannot make any combos?”
FWIW– in a 25 card deck with no power cards, here are the odds of getting 8 in a row of the same type:
13/12: 1-in-607 games
14/11: 1-in-341
15/10: 1-in-167
16/9: 1-in-84
17/8: 1-in-44
18/7: 1-in-25
19/6: 1-in-14
20/5: 1-in-8.6
21/4: 1-in-5.3
22/3: 1-in-3.4
23/2: 1-in-2.2
24/1: 1-in-1.5
25/0: 1-in-1.0
So, if you are having this problem it is either a rare freak occurrence and brush it off, or your ratios of character to object cards is way out of balance and it is worth looking into that
Also, as far as the relative numbers of each type of card, the fewer cards you have the lower the odds of running into this. IE, running a 20/19 deck will have a 1:305 chance of 8-in-a-row of the same type, roughly twice the chance of the smaller deck (above) that also had the counts within 1.
I can’t believe I didn’t see this comment when you made it, but I hope you’re not regularly thinking in terms of those “8-in-a-row” figures you posted. I don’t think so, but please make your guildmates aware that there is a big difference in the percentages between drawing 8 cards all at once and drawing 5+1+1+1 cards over 3 turns. This was a point I thought I made loudly in the article. Yes, if you’re measuring the over the aggregate number of games you’ll find, on average, a very low percentage of 8-card ragequits (with the exceptions you noted). Once you start the game and take the first 5 Character cards in a deal, however, the odds jump WAY up. That’s, I think, what players don’t understand very well.